DIY car maintenance means the basic checks you do yourself between logbook services, like testing your tyre pressure or topping up washer fluid. More drivers are giving it a go as costs rise.
Youi's 2026 survey found 47% of Australian drivers had put off at least one maintenance task (not counting cleaning), up from 35% in 2024. In Queensland, RACQ found more than half of drivers are trying DIY fixes, and some are asking AI tools for repair advice.
Most of these checks need only a tyre pressure gauge, a clean rag and your owner's manual. A few call for a torch, a funnel or a pair of gloves. This guide will cover 13 checks, how often to do each one, and the jobs you should leave to a qualified mechanic.
Why DIY car maintenance is worth doing
Doing your own checks pays off in a few ways:
- Early fault detection: Oil leaks, worn tyres and cracked hoses show up before they leave you stranded. Flat tyres and battery problems are among the most common reasons drivers call for roadside help.
- Lower running costs: Air at a service station is usually free, and checking your oil takes only a rag and level ground. The right tyre pressure also helps your tyres last longer.
- Owner knowledge: After a few weeks, you'll notice when something sounds, smells, or feels different.
- Clearer workshop visits: Telling a mechanic exactly what you've noticed can speed up the diagnosis.
Your own checks sit alongside a logbook service, not in place of one. The manufacturer's service schedule sets how often a professional needs to look over your car. Our logbook service guide covers what's included.
Weekly and fortnightly checks
Every week or two, run through your tyre pressure, tyre tread, engine oil, and exterior lights. All four together take less than 10 minutes.
1. Tyre pressure
Tyre pressure is how much air is in your tyres, measured in pounds per square inch (psi) or kilopascals (kPa). The right pressure gives you better grip, shorter braking distances, lower fuel use and longer-lasting tyres.
Your tyre placard lists the recommended cold tyre pressure for your car. You'll usually find it on the driver's door jamb, inside the fuel flap or on the glovebox lid, and it's repeated in the owner's manual.
Most placards show both psi and kPa. Passenger cars commonly sit in the low-to-mid 30s psi, while SUVs, 4WDs and light trucks often need more.
Check pressure when the tyres are cold, because driving heats them and gives a falsely high reading.
Air is usually free at Australian service stations, though it isn't guaranteed, and the built-in gauges aren't always accurate. A pen-style gauge from an auto parts shop gives a more reliable reading.
Some cars with a tyre pressure monitoring system (TPMS) need a reset after you adjust the pressures, and your owner's manual explains how.
How to check tyre pressure:
- Unscrew the valve cap from the tyre valve.
- Press the gauge firmly onto the valve.
- Compare the gauge reading with the placard value.
- Add air until the reading matches the placard. If it's too high, release some air by gently pressing the pin in the centre of the valve.
- Refit the valve cap to keep dirt out of the tyre valve.
- Repeat the check on the spare tyre.
The placard pressure suits everyday driving, but heavy loads and towing can call for higher pressures. Use the loaded figure on the placard or in your owner's manual if there is one, and check your trailer or caravan's own placard too. Never go above the maximum pressure printed on the tyre sidewall.
Driving a 4WD on rough gravel or corrugated tracks? ARB suggests running about 4 to 6 psi below your sealed-road pressure for a smoother ride and better traction. Pump the tyres back up before you return to sealed roads.
2. Tyre tread depth
Tread depth is how deep the grooves are on the part of the tyre that touches the road. Those grooves clear water and help the tyre grip a wet road.
The legal minimum across Australia is 1.5mm in the main (principal) grooves, though many tyre makers and retailers recommend replacing tyres at about 3mm.

Tread wear indicators are small raised bars of rubber moulded into the main grooves. When the tread is worn level with them, the tyre is due for replacement. Uneven wear across the tyre points to a wheel alignment, suspension or inflation problem.
Rubber also breaks down with age, so major tyre makers recommend a professional inspection every year once a tyre is five years old, and replacement by ten years even if the tread looks fine.
How to check tyre tread depth:
- Park on flat ground and apply the handbrake.
- Turn the steering wheel to full lock so you can see the whole width of the front tyres.
- Find the tread wear indicators inside the main grooves. A small triangle or the letters TWI on the tyre shoulder marks each indicator's position.
- Compare the tread with the indicators. If the tread is level with them, replace the tyre.
- If you have a tread depth gauge, measure the main grooves at several points around each tyre. If you don't, try the 20 cent coin test. Push the coin into the groove with the platypus's bill facing down. If the tread doesn't reach the bill, you have about 3mm or less left.
- Compare the wear on the inner edge, centre and outer edge of each tyre.
- Inspect each sidewall for cracks, bulges and cuts.
- Check how old each tyre is from the last four digits of the DOT code on the sidewall. The first two digits show the week and the last two show the year, so 2419 means week 24 of 2019.
3. Engine oil level
Engine oil lubricates the engine's moving parts and helps keep heat down. Engines burn or leak a little oil between services, so the level slowly drops. Running low can wear an engine out quickly, which is why a regular check is worth the two minutes.
You check the level with the dipstick, a thin metal rod that dips into the oil sump. Look for a brightly coloured handle, often yellow or orange, and MIN and MAX marks near the tip. Some newer cars have no dipstick and show the oil level on the dashboard screen instead.
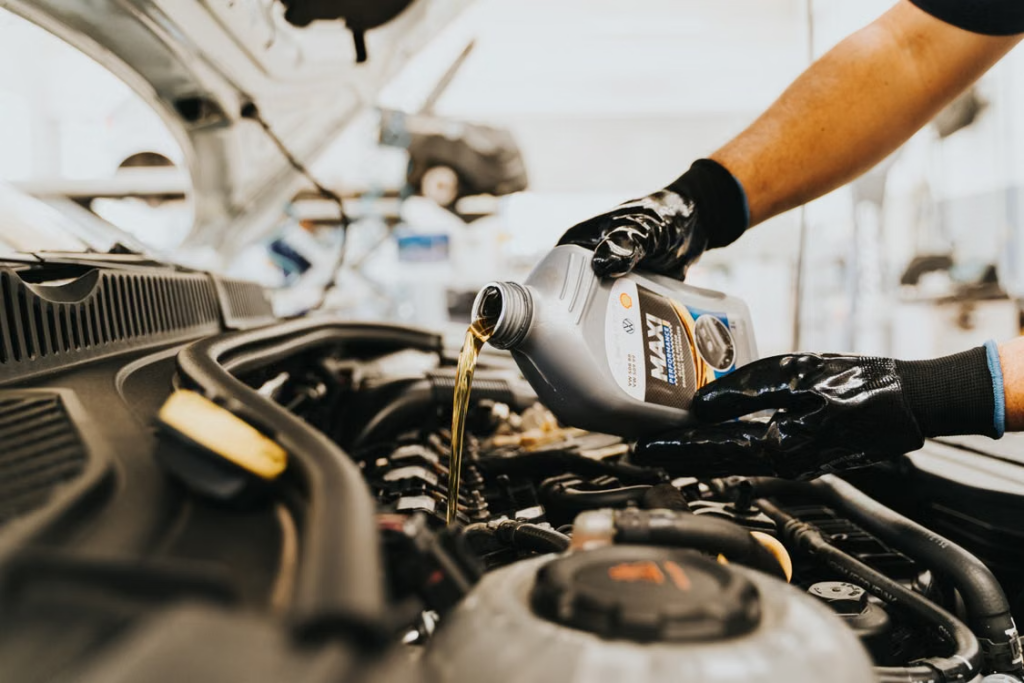
The oil should sit between the MIN and MAX marks, ideally closer to MAX. Fresh oil is amber and see-through, but it darkens with normal use, so colour alone is an unreliable guide. Gritty or sludgy oil needs changing. Milky oil can mean coolant is mixing with it, so see a mechanic straight away. Your logbook sets the oil change interval.
How to check the engine oil level:
- Park the car on flat ground and apply the handbrake.
- Switch off the engine and wait about 10 minutes so the oil can drain back to the sump. A few manufacturers want the engine warm, so follow your manual.
- Pull out the dipstick and wipe it clean.
- Push it fully back in, then pull it out again.
- Read the oil film against the MIN and MAX marks.
Your owner's manual specifies the right oil grade. On many engines, the gap between MIN and MAX is around one litre, but it varies. Add oil a little at a time (about 250 millilitres) through a clean funnel, then recheck the dipstick before adding more.
Too much oil can damage an engine too. Our guide to how often to service your car covers typical oil change intervals.
4. Exterior lights and indicators
Your exterior lights include the headlights, high beams, tail lights, brake lights, reverse lights, indicators and hazard lights.

Working lights keep you visible and your car roadworthy. Depending on the state, a faulty light can bring a fine, a defect notice and, in some cases, demerit points.
How to check exterior lights:
- Turn the ignition on and switch on the headlights, high beams and hazard lights.
- Walk around the car and confirm that every light works and shines evenly.
- Test the left and right indicators, including the side repeaters.
- Test the brake lights and reverse lights with a helper, or watch the reflection on a garage door.
Headlight lenses should also be clean, uncracked, and clear. If you tow a trailer or caravan, give its lights the same check.
On older cars with standard halogen globes, you can often swap a bulb yourself by following the owner's manual. Skin oil on halogen glass shortens a bulb's life, so use gloves or a clean cloth when you handle the new globe. Many newer cars use LED units, sealed assemblies, or computer-controlled lighting, and those repairs should go to a qualified professional for repairs.
Monthly checks
Once a month, check your coolant, brake and power steering fluid, windscreen wipers and washer fluid. Start each check with the car on flat ground, the handbrake on and the engine off.
5. Coolant level
Coolant absorbs engine heat and stops the engine overheating. It sits in a see-through plastic reservoir with MIN and MAX marks, and some reservoirs also show a separate COLD level.
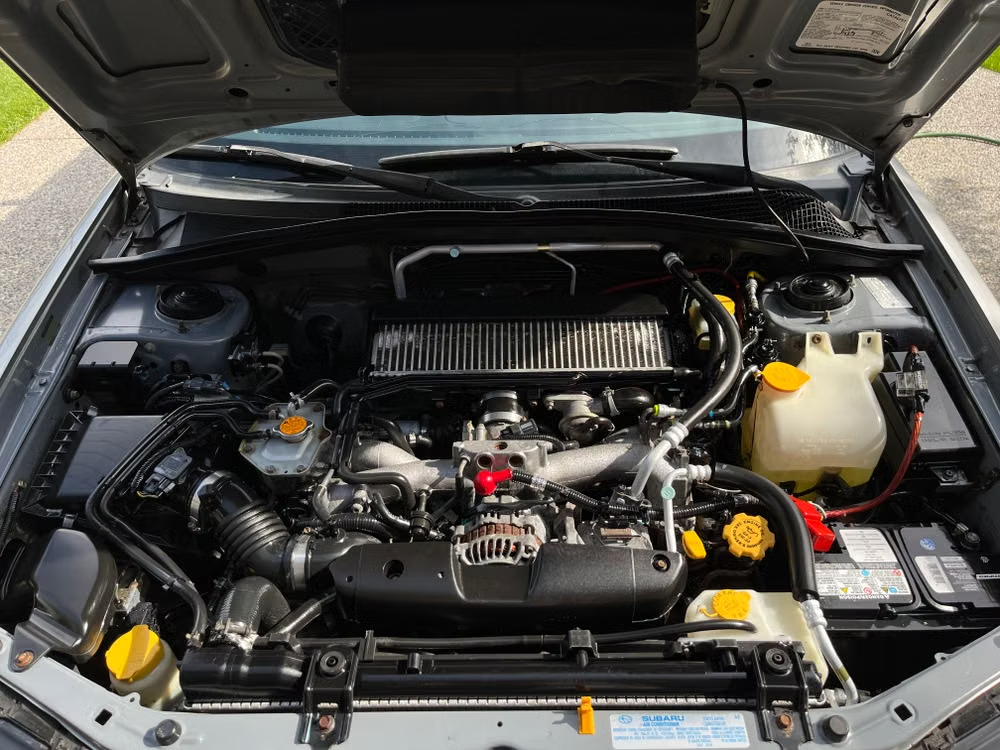
A hot cooling system is under pressure, and the coolant can spray out and cause severe burns. Never open the radiator cap or reservoir cap on a hot engine.
If the level keeps dropping, the cause could be a leak or an internal engine fault, and that needs a mechanic rather than repeated top-ups.
How to check the coolant level:
- Park on flat ground, switch off the engine, and wait until it's completely cold. That's at least 30 minutes, and longer after a long drive.
- Open the bonnet and find the coolant reservoir, using the owner's manual if needed.
- Read the coolant level through the side of the reservoir against the MIN and MAX marks.
- If the level is low, top up only with the coolant type your owner's manual specifies, mixed as the label directs. Don't mix different coolant types.
- Open the cap slowly with a rag over it, add coolant to the level between the marks, and refit the cap firmly.
- Record the top-up. A second top-up within a few weeks is a reason to book a mechanic.
6. Brake fluid and power steering fluid
Brake fluid carries the force from your brake pedal to the brakes. Power steering fluid makes hydraulic steering systems lighter to turn. Cars with electric power steering don't use power steering fluid, so check your owner's manual to see which reservoirs yours has.
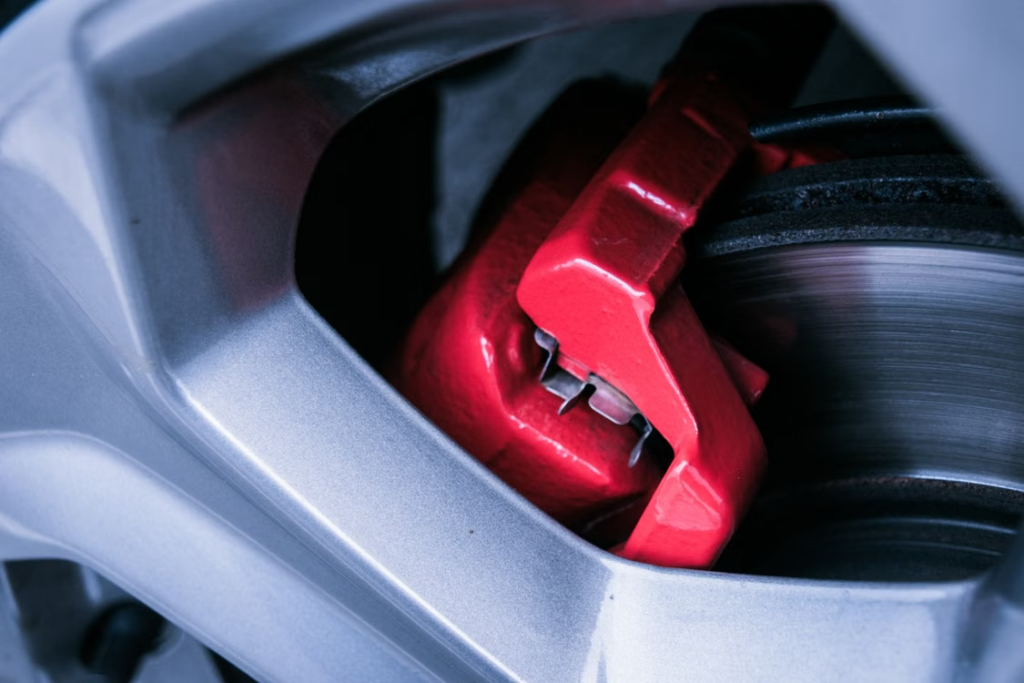
A car that's serviced regularly rarely needs a top-up of either fluid. Brake fluid drops slowly as the brake pads wear, so a low level can mean worn pads or a leak, and either needs a prompt mechanic inspection.
Brake fluid also absorbs moisture over time, so manufacturers usually schedule a replacement every two to three years (check your logbook). It can also damage paintwork if it spills. Keep the reservoir caps closed unless your owner's manual says otherwise.
How to check brake fluid and power steering fluid:
- Park on flat ground, apply the handbrake and switch off the engine.
- Find the brake fluid reservoir, usually at the back of the engine bay on the driver's side, on top of the brake master cylinder.
- Wipe the outside of the reservoir clean and read the level against the MIN and MAX marks without opening the cap.
- Note the fluid colour. Fresh brake fluid is clear to light amber. If it looks dark, mention it at your next service.
- Find the power steering reservoir, if fitted. The cap often shows a steering wheel symbol.
- Read the power steering level from the reservoir marks, or from the cap dipstick if the owner's manual describes one.
- Book a mechanic for any fluid below the MIN mark.
7. Windscreen wipers
Wiper blades clear water and debris from the windscreen. Sun and heat wear the rubber down, so most blades need replacing every 6 to 12 months. Streaks, smears, squeaking, shuddering, skipping, cracks, and hardened rubber are all signs they've had it.
If the blades are scratching the glass, replace them immediately and have the windscreen checked.
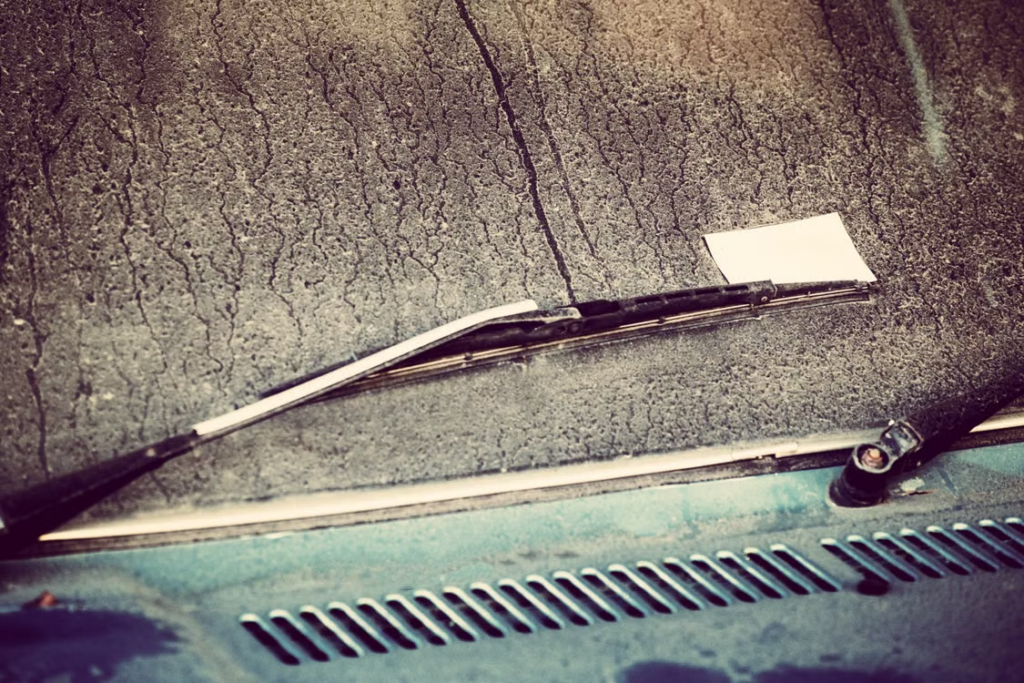
There are two common types. Insert-style blades have a replaceable rubber strip inside a metal frame, while Euro-style (beam) blades are replaced as one complete unit. Auto parts shops and dealers can find the right blade for your make and model, and it's best to replace them as a pair.
How to replace a Euro-style wiper blade:
- Lift the wiper arm until it locks upright.
- Press the release tab on the blade connector.
- Slide the old blade off the arm.
- Click the new blade onto the connector and tug gently to check it's secure.
- Lower the wiper arm carefully onto the windscreen.
8. Windscreen washer fluid
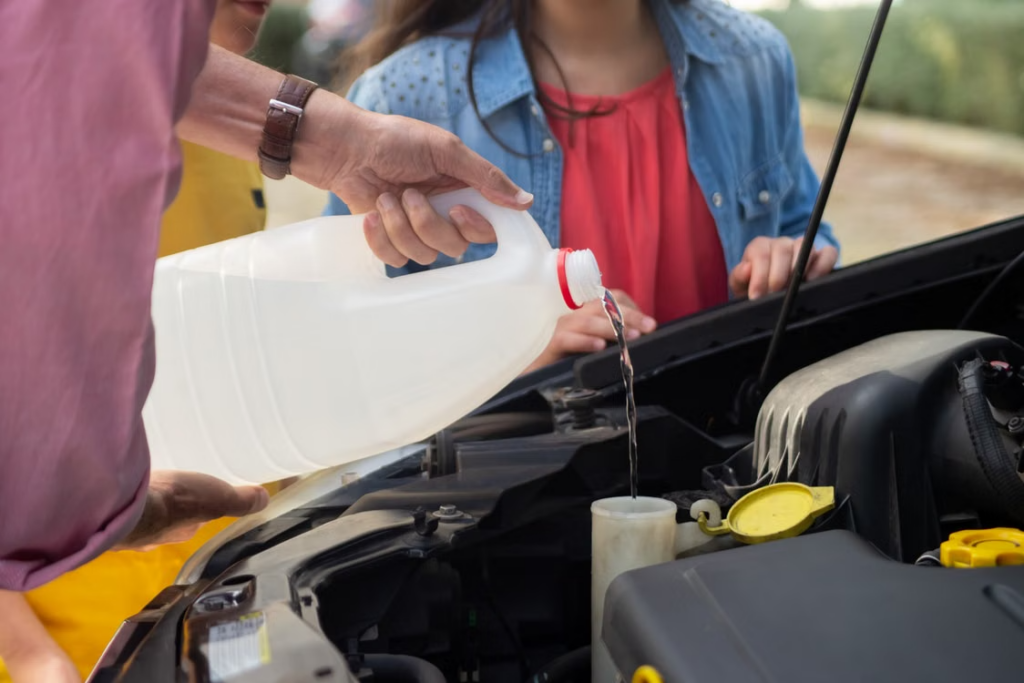
Washer fluid is the cleaning liquid your washer jets spray onto the windscreen. Many newer cars also use it to clean headlights, cameras and sensors. The reservoir sits under the bonnet, and its cap usually has a windscreen spray symbol.

Stick to clean water mixed with an automotive washer additive. Dishwashing liquid and household detergents can leave streaks and damage wiper rubber. Running the wipers on a dry, dirty windscreen also wears the blades faster.
How to top up washer fluid:
- Open the bonnet and find the washer reservoir, using the owner's manual if needed.
- Check the level through the side of the reservoir, or with the dipstick-style indicator some caps include.
- Mix the washer additive with clean water as the product label directs, or use a premixed washer fluid.
- Pour the fluid in with a clean funnel, stop just below the filler neck, and refit the cap.
- Test the washers from the driver's seat. The spray should hit the windscreen within the wipers' sweep.
- Clear a blocked jet gently with a fine needle, unless the car uses integrated jets, which need a professional.
Every 6 to 12 months
Every six to 12 months, check the battery, engine air filter, hoses, drive belts, and the underside of the car for leaks. A long road trip or a change of season is a good time to do it.
9. Car battery and terminals
Your car's 12-volt battery powers the starter motor and the electrical systems. A weak battery is one of the most common causes of breakdowns, so check the battery and terminals every six months.
White or blue-green powder on the terminals is corrosion. A cracked, leaking, or swollen battery case means the battery needs replacing.
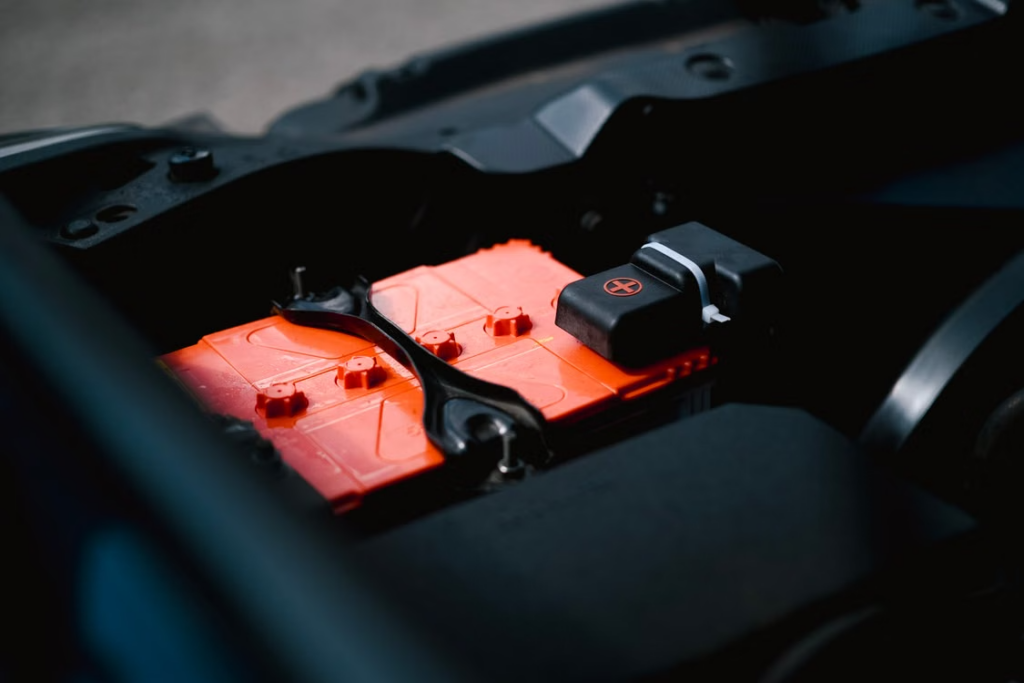
Slow cranking, dim lights at start-up, or a battery older than about three years are all good reasons to have it tested. Many workshops and auto parts shops will do it for you. Battery acid can burn, so wear gloves and safety glasses.
Some newer cars lose their settings or need an electronic reset after the battery is disconnected, so check your owner's manual first. Hybrid and electric vehicles also carry high-voltage components, usually marked in orange. Never touch them.
How to check and clean the battery terminals:
- Switch off the engine, remove the key, and put on gloves and safety glasses.
- Inspect the battery case for cracks, swelling, and leaks.
- Check that the battery hold-down clamp keeps the battery firmly in its tray.
- Inspect both terminals for corrosion, and check by hand that each cable clamp is tight.
- If there's corrosion and your owner's manual allows it, disconnect the negative (-) terminal first, then the positive (+) terminal.
- Scrub the posts and clamps with a wire brush and a paste of bicarb soda and water, then wipe them clean and dry.
- Reconnect the positive (+) terminal first, then the negative (-) terminal, and tighten each clamp until snug.
- Coat the terminals with petroleum jelly or a terminal protector spray.
10. Engine air filter
The engine air filter is usually a pleated paper element that stops dust and debris from getting into the engine. It sits inside the airbox, a plastic housing connected to the air intake. Your logbook sets the replacement interval, and dusty or unsealed roads shorten it.
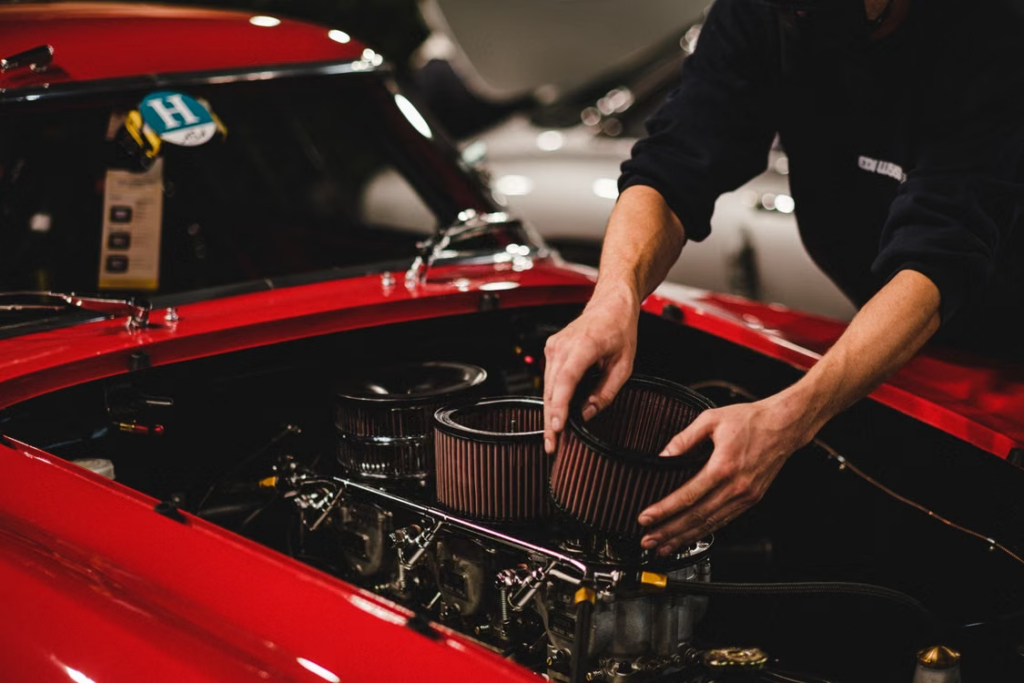
A dark, grey, or dust-caked filter needs replacing. It's better not to clean a paper filter, because compressed air can tear it and tapping it on a hard surface can bend it out of shape. Make sure the new filter matches your car's make and model.
How to check and replace the engine air filter:
- Switch off the engine, open the bonnet, and find the airbox, using the owner's manual if needed.
- Undo the airbox clips or screws and lift the lid.
- Lift out the air filter and note which way it sits.
- Hold the filter up to the light and check for dirt, dust build-up and debris.
- Wipe loose dirt, leaves and insects from inside the airbox with a damp cloth.
- Fit the new filter the same way round as the old one, with its rubber edges sealing evenly all the way round.
- Refit the lid and secure every clip or screw.
11. Radiator and heater hoses
Radiator and heater hoses are rubber pipes that carry hot coolant between the engine, the radiator and the heater. A split radiator hose can make the engine overheat quickly.
A healthy hose feels firm but flexible when you squeeze it. If it feels rock-hard, brittle, soft or spongy, it needs replacing.
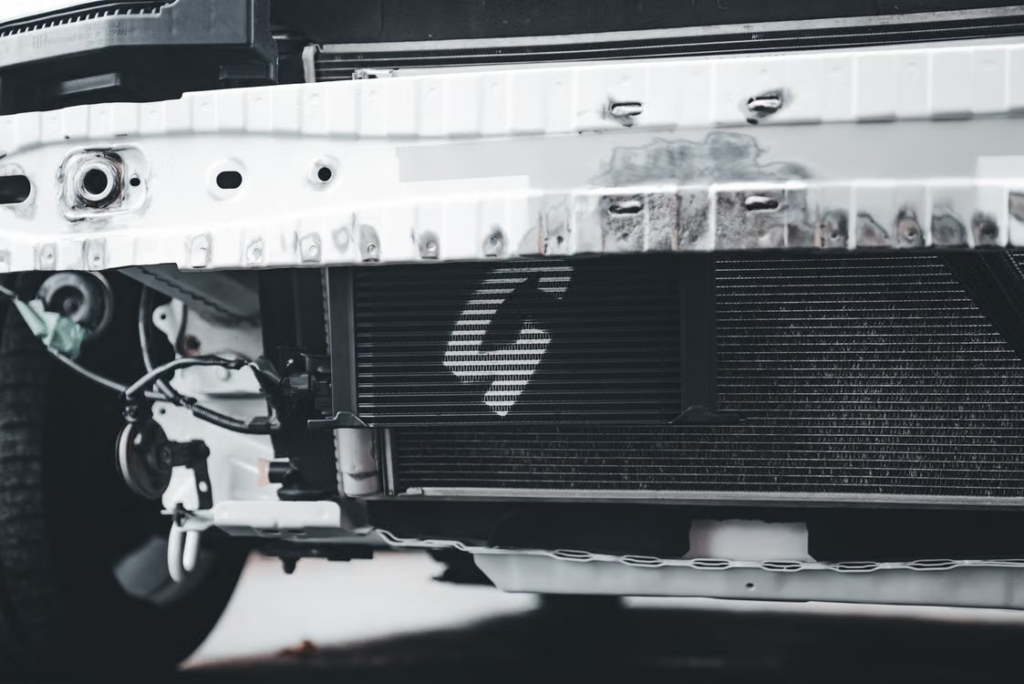
Cracks, bulges, and crusty, coolant-coloured residue around the clamps are also signs a hose is failing. On hybrids and electric vehicles, take any hose concern to a professional trained on those systems.
How to check the hoses:
- Park, switch off the engine, and wait until it’s completely cold.
- Open the bonnet and find the upper and lower radiator hoses, the large hoses between the engine and the radiator.
- Find the heater hoses, the smaller hoses that run towards the firewall.
- Squeeze each hose along its length and feel for hard, brittle, soft, or spongy sections.
- Look for cracks, bulges, and splits, especially near bends and clamps.
- Check every hose joint for coolant residue or dampness.
- Book a mechanic to replace any damaged hose.
12. Drive belts
The drive belt, often called a serpentine belt, is a ribbed rubber belt that powers the alternator, the air-conditioning compressor, and, on many engines, the water pump. If it snaps, the car can stop.
Cracks, fraying, missing chunks, and a shiny, glazed surface are signs of wear, and a squeal at start-up or under acceleration often means the belt is loose or worn.
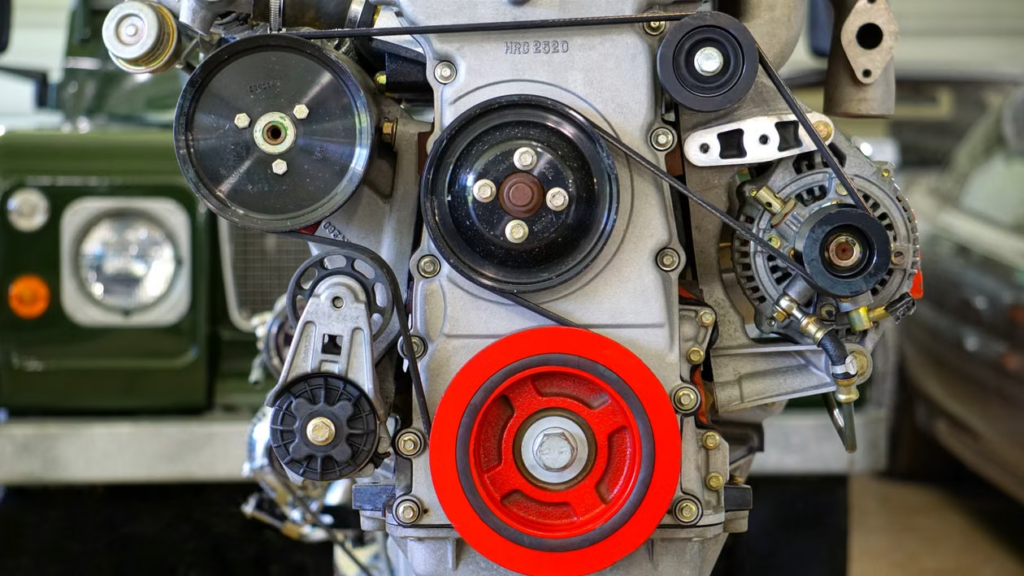
Don't confuse it with the timing belt, which sits behind a cover on the engine and has its own replacement interval in the logbook. Replacing or tensioning either belt is a job for a mechanic.
How to check the drive belt:
- Switch off the engine, remove the key, and wait for the engine to cool.
- Open the bonnet and find the drive belt at the front or side of the engine. A belt routing diagram often sits on a sticker under the bonnet.
- Shine a torch along the ribbed side and look for cracks, fraying, missing chunks, and glazing.
- Press gently on the longest straight section of the belt and feel whether the belt is slack.
- Start the engine, close the bonnet, and listen for a squeal at start-up.
- Book a mechanic for any worn, loose, or noisy belt.
13. Fluid leaks under the car
A puddle under a parked car is an early warning sign. Brown or black fluid is usually engine oil, green, pink, or orange fluid is usually coolant, and red fluid can be transmission fluid or power steering fluid. Clear water under the front of the car is normally just condensation from the air conditioner.
Oily residue on a shock absorber means it's leaking, and a torn CV boot near a front wheel flings grease onto the inside of the wheel rim. Never crawl under a car that's held up only by a jack, because it can fall. Checking from beside the car is as far as DIY should go.
How to check for fluid leaks:
- Park overnight on a clean, dry surface, or slide a sheet of cardboard under the engine bay.
- Check the ground or cardboard the next morning for fresh drips.
- Note the position of each drip: front, middle, or rear of the car.
- Note the colour of each drip against a white paper towel.
- Shine a torch under the car from the side and look for wet or oily patches, leaking shock absorbers, and torn CV boots.
- Photograph any leak and show the photo to a mechanic.
How to understand your dashboard warning lights
Dashboard warning lights tell you when something is wrong or when a feature is switched on. The colour shows how urgent it is.
- Red: A red light usually means a serious fault or safety risk. Pull over somewhere safe, switch off the engine, and find out what the light means.
- Amber or orange: Something needs attention soon, so book a workshop check. If the check engine light is flashing, pull over safely and stop.
- Green, blue, or white: A feature is switched on, such as your high beams or cruise control. No action is needed.
The seven warning lights below appear on most modern cars. Red lights need immediate action, and amber lights need a prompt check.
| Warning Light | Symbol | Meaning | Required Action |
| Oil pressure (red) | Oil can | The engine has lost oil pressure | Stop safely, switch off the engine, and check the oil level |
| Engine temperature (red) | Thermometer | The engine is overheating | Pull over, switch off, and let the engine cool completely before checking the coolant level |
| Brake system (red) | Exclamation mark or BRAKE | The handbrake is on, or brake fluid is low | Release the handbrake. If the light stays on or the pedal feels soft, don't drive |
| Charging system (red) | Battery | The alternator or charging system has a fault | Head to a mechanic or call roadside assistance before the battery goes flat |
| ABS (amber) | ABS letters | There's a fault in the anti-lock braking system. Your normal brakes should still work, but without anti-lock | Drive gently and book an inspection |
| Tyre pressure (amber) | Horseshoe with an exclamation mark | One or more tyres are under-inflated | Check and inflate your tyres to the placard pressure |
| Check engine (amber) | Engine outline | The car has detected an engine or emissions fault | Head to a mechanic or call roadside assistance before the battery goes flat |
Symbols vary between manufacturers, so your owner's manual is the final word on your car. If a warning light stays on, a workshop can read the fault code with a scan tool.
What to leave to a qualified mechanic
Leave any job that affects braking, steering, fuel, ignition or occupant protection to a qualified mechanic. That includes air-conditioning regassing, fuel system work, ignition maintenance, suspension work, and brake system repairs.
Airbags and the high-voltage parts of hybrids and EVs are also strictly for professionals.
Many newer cars have advanced driver assistance systems (ADAS), such as lane-keeping cameras and radar sensors. These cameras often need recalibrating after a windscreen replacement, and some sensors need it after a wheel alignment. Computer-controlled modules also make jobs that look simple riskier than they seem.
A simple test: if your owner's manual doesn't cover a job, leave it to a workshop. The Autoport app has a workshop finder to help you find one.
Keep a record of what you've done
A maintenance record is a dated log of every check, top-up, part, and service your car has had. A documented service history gives buyers confidence and can help your car's resale value.
It also matters if you ever make a warranty claim, because you may need to show the car was serviced on schedule. And it saves a mechanic from re-diagnosing faults that were already fixed.
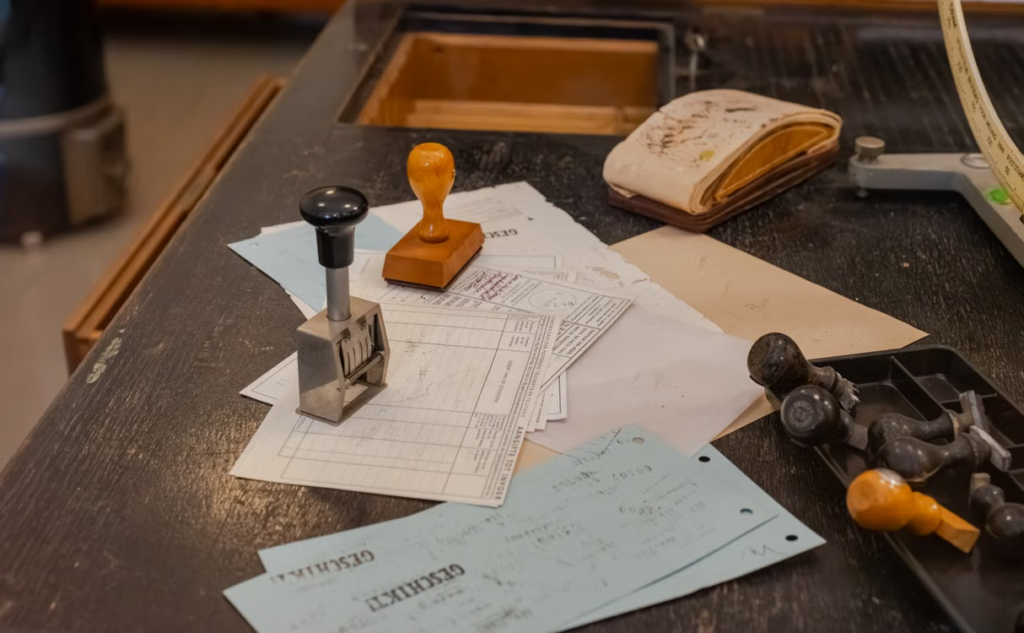
A record also shows patterns that a single check can miss. Three coolant top-ups in two months, for example, point to a leak. For each entry, note the date, the odometer reading, what you did, and any parts or fluids you added, and keep the receipts.
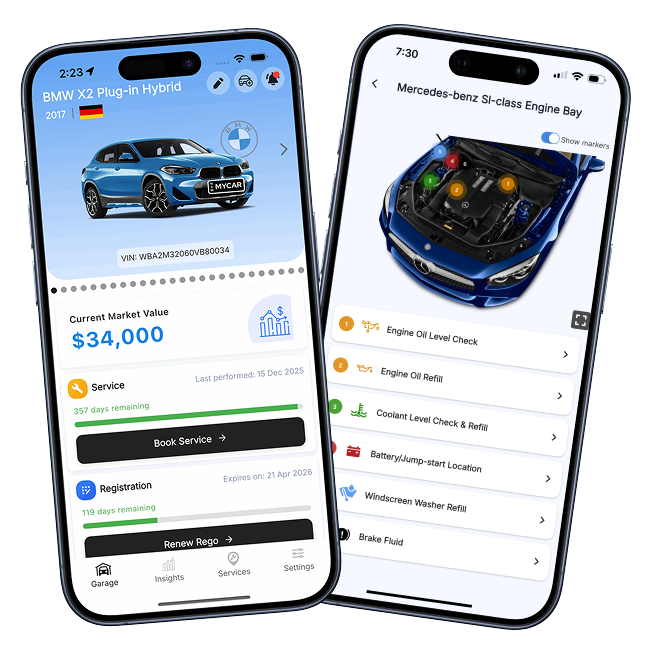
A paper logbook or a spreadsheet works fine as a basic record. A car maintenance app such as Autoport keeps your service history, receipts, and documents against one vehicle, and sends reminders for services and rego, so it's all in one place when you need it.
FAQs
How much can DIY car maintenance actually save me?
The main saving is the labour. Mechanic quotes on ServiceSeeking averaged about $134 an hour in 2026. AutoGuru estimates a workshop wiper blade replacement at $30 to $150, and an air filter replacement at $50 to $200, depending on the parts. Do either job yourself and you only pay for the part.
Your actual savings depend on your car, the part, and the workshop. Catching a fault early can save more, because an early repair usually costs less than a late one.
Is DIY car maintenance safe for a modern car?
Yes, the basic checks in this guide are safe on almost any car. Tyre pressure, fluid levels, lights and wipers carry very little risk. Bigger jobs are riskier on newer cars, because ADAS sensors and computer-controlled modules can react to work that looks simple.
Be careful with AI chatbots and forum posts too. RACQ warns that they can't physically inspect your car or confirm a repair was done properly. Your owner's manual is the best guide to what's safe to do yourself.
How often should I check my car?
Every week or fortnight, check your tyre pressure, tyre tread, engine oil and exterior lights.
Every month, check the coolant, brake and power steering fluid, wiper blades and washer fluid.
Every 6 to 12 months, check the battery, air filter, hoses and drive belts, and look for fluid leaks. Before a long trip, run through all of them.
Does DIY maintenance affect my rego or roadworthy check?
It won't replace a logbook service or a roadworthy inspection (in NSW, the eSafety check, still widely called a pink slip). What it does is improve your chances of passing, because worn tyres, blown lights and damaged wipers can each fail an inspection.
Rules vary by state, so check with your state's transport authority. NSW, for example, requires an annual eSafety check for most light vehicles over five years old.
Keep your rego renewal date in the same calendar as your maintenance checks, or let the Autoport app remind you of both.
Conclusion
Regular DIY checks lower your risk of an unexpected breakdown, and most of them need nothing more than a tyre gauge, a rag and a routine. Knowing when to call a professional matters just as much as knowing how to check your oil.
Once you've ticked off your own checks, the easiest way to stay on top of the rest is to keep everything in one place.
The free Autoport app tracks your service, rego and insurance dates, sends reminders, and stores your invoices, receipts and documents against your car.
It also has a workshop finder for anything better left to the professionals. Download it from Google Play or the App Store.